How To Make Doll Hair
- LuParis

- Jun 13, 2024
- 2 min read

Today I wanted to discuss something that every new doll maker has struggled with at some time or another: attaching the doll's hair. When you get to this point of creating your doll, you might have questions such as "What material should I use for the hair?" and "How do I attach it to the doll's head?" Well I'm here to show you my method for making doll hair. And it's easy, quick, and simple.
What Material Do I Use?
There are a number of materials you can use to create hair for your doll. The most popular, and the one I use, is yarn, but you can also use synthetic wigs, hair extensions, or fabric. I haven't experimented with anything other than fabric and yarn yet, so today we're going to talk about yarn.
Yarn is perfect for creating hair for dolls for many reasons. There's a variety of it available. It comes in many sizes, weights, colors, and textures. It can be made from polyester, cotton, wool, acrylic, and even hemp. It's easy to find and easy to use. Most kinds of yarn can be sewn through.
How To Attach It To The Doll's Head?
As a disclaimer this is the method I use, and it may not be better than other methods that you can find online. But as someone who exclusively hand sews and doesn't use a lot of glue during my doll making process it's worked out great for me and I just figured I'd share it in case it helps someone else.
Items needed:
Shoe box lid (an old DVD case works well too)
Yarn
Matching thread
Needle
Scissors
First take your yarn and shoe box lid and wrap the yarn 60-100 times (depending on the size of the yarn) around your shoe box lid. As a side note I usually need to wrap my yarn 85-90 times and I mostly use cotton or acrylic yarn.
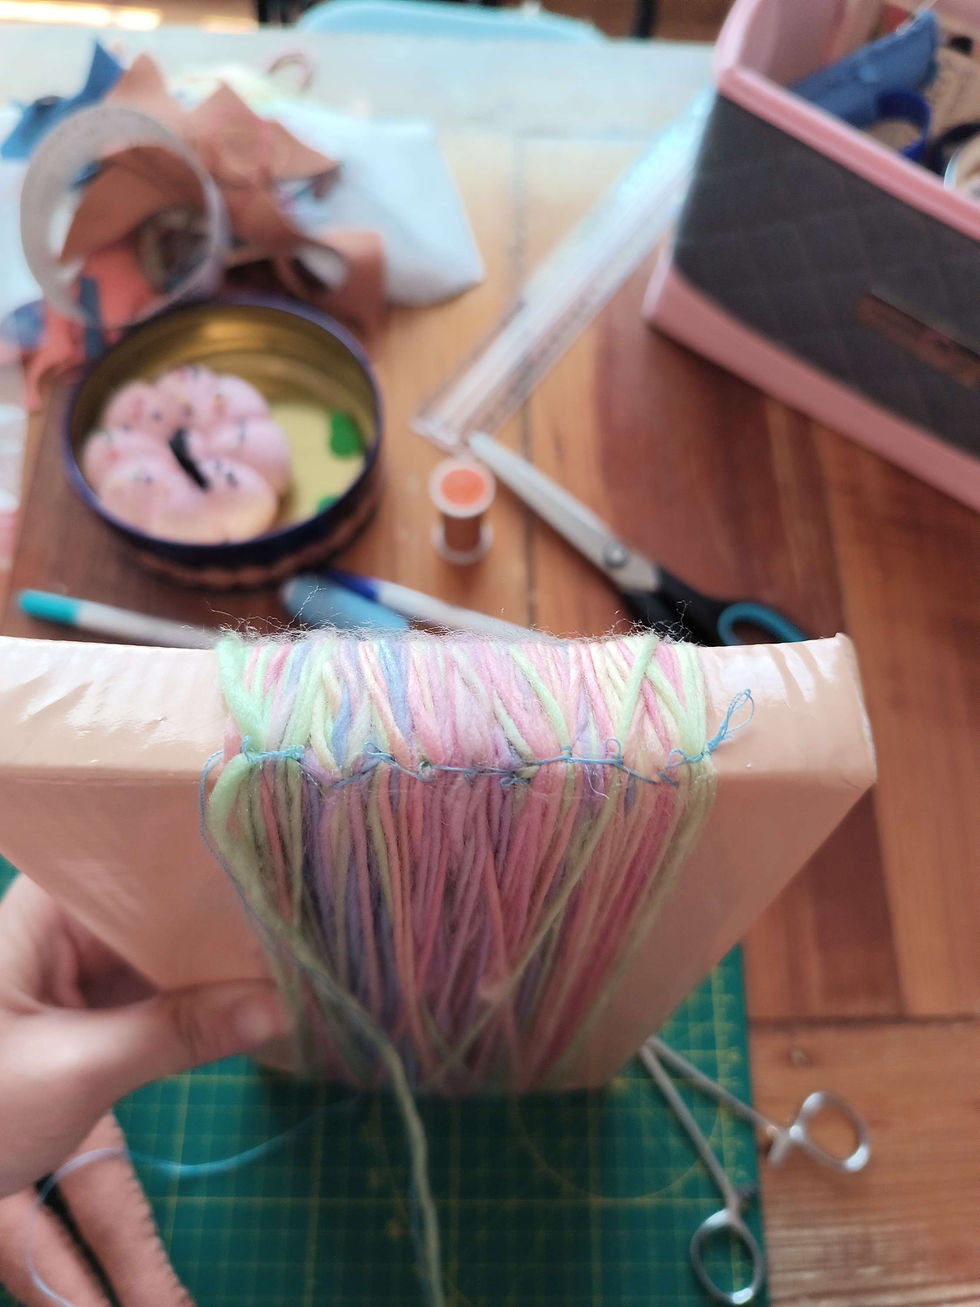
With your yarn still wrapped around the lid, take thread in a matching color and sew across the yarn at the top of the lid using back stitch. Then using your scissors cut the bottom of the yarn. You should now have one big weft of yarn hair.
Pin the yarn to the top of the doll's head. Using back stitch again, sew the weft to the doll's head.
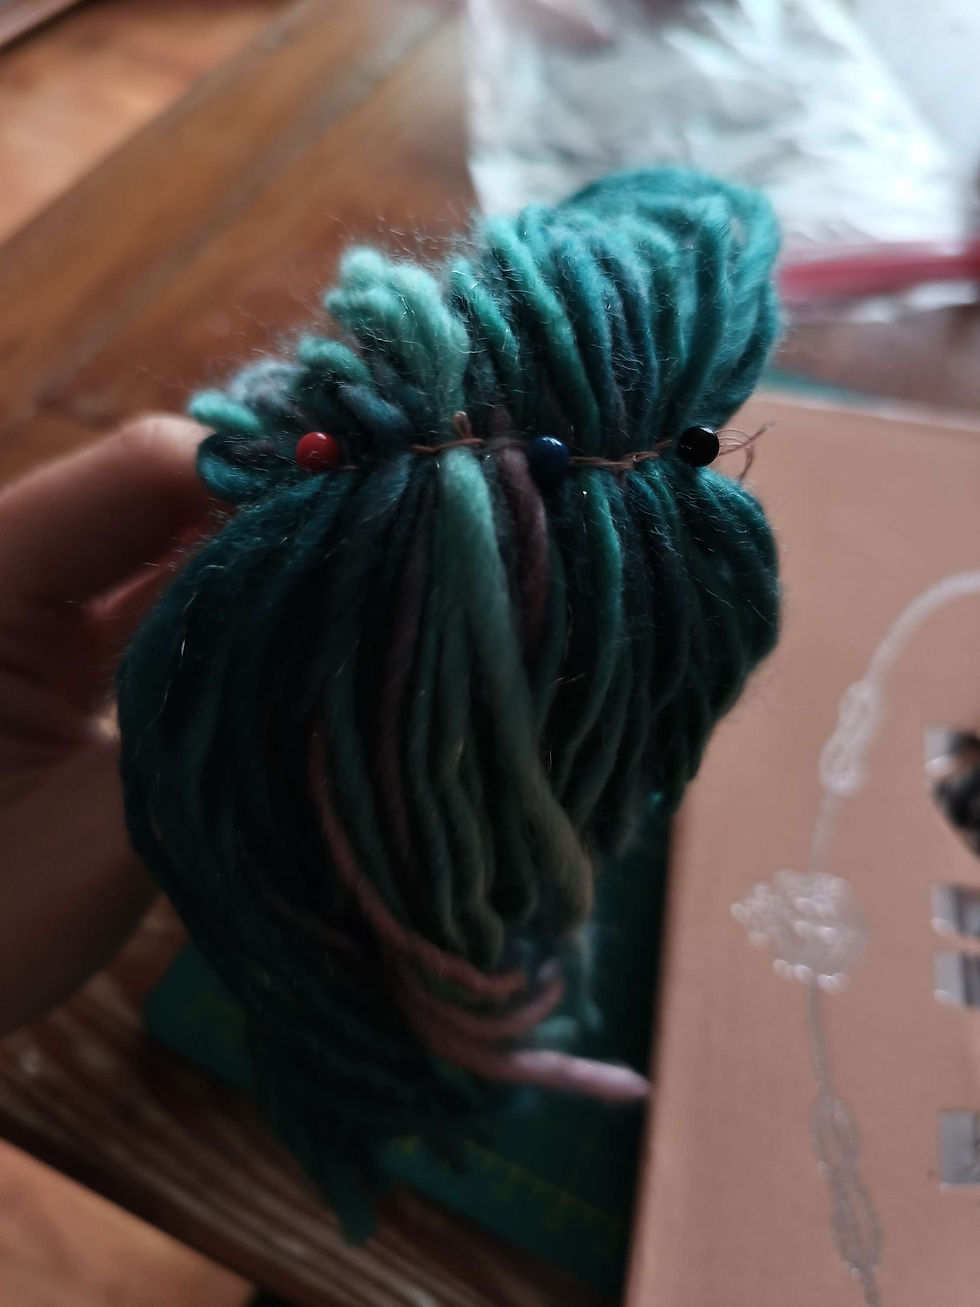
Now she should have hair on the top of her head but a big bald spot on the back of her head. Lay down a layer of yarn and back stitch one last time across the back of the doll's head. Alternatively you can use glue at this point.

There you have it! Doll hair! You can now style it, cut it, or add bows and ribbons to it.
Check out my dolls in the gallery at the bottom of the home page, or check out my Etsy shop, LuParisDolls.
Link to my Etsy shop: https://luparisdolls.etsy.com


Comments